
Contact Search on Seamless
Learn how to set filters, customize layouts, and save searches for efficient prospecting. Maximize success with smart tips, advanced strategies, and best practices for managing leads and achieving your outreach goals.
Accessing Contacts Search
Navigate to Contacts Search through the Search icon on the left icon menu. On the Contacts Search page you will be able to start your contacts search, and also access your Search History and Saved Searches.
A Guide to Contact Searching
- Locate the Contacts Search Filters section. First, set and name your Default List for your contacts to be saved to. Create a new list for your search, or select a previously created list as default for your search.
Creating lists will help you stay organized with your contacts and managing imports/downloaded contacts! Learn more about Creating and Managing Lists: Managing your Lists of Saved Contacts
- Add your search criteria to the corresponding filters based on your knowledge of the industry, market, and persona you are targeting.

Pro-Tip
When starting out, keep it simple! Apply the filters you know to apply for your target market. You can always tailor your list or apply more filters later!

- Click on the blue Search button to begin creating a list of contacts that best match your search criteria. Review the search results and decide if any filters needed to be added or excluded!
- Contact profile previews will be displayed on the right hand side. The contact preview will display the contact’s full name, title, and company. Click Find next to each contact you want to research and generate a full contact profile, including B2B professional phone number(s), email(s), location information and more!
Clicking Find uses credits based on your Contact Data preference in settings. Find will use 1 credit per contact for emails only, 5 credits for phones only, or 6 credits for full contact data including emails, phones, and all available profile information. Hover over any Find button to see its cost before you click. If you found a contact’s email and later need the phone, click Find Phones, and you only pay for the phone.
Good to know- If an Owner or Admin disabled email or phone research for your organization, those Find buttons are grayed out. Only an Owner or Admin can turn them back on.
- If your plan is locked to Full Contact, every find researches the full contact for 6 credits, and you won’t see Find Emails or Find Phones options.
- For an expedited workflow, use the Find All button in the top right to research every contact on the page. The button follows your Contact Data setting, so it shows Find All Emails, Find All Phones, or Find All. Click the arrow next to it to choose a different option. Hover over the button to see the total cost before you run it. For example, 50 contacts at 1 credit each is 50 credits.
- Anytime to click Find or Find All, contact profiles will be displayed right on the search page, and also to the My Contacts page and list previously set as default. Download, import, or manage your contact(s) directly on the search page, or head back into your My Contacts page in Seamless.AI to filter by Total AI and others before downloading/importing!

Search Filter Options
Users can apply a variety of filters to target their ideal customer personas. Available filters include:
Company - Learn more about the Company Filter.
Full Name - Learn more about the Full Name Filter.
Industry - Learn more about the Industry Filter.
Titles - Learn more about the Titles Filter.
Seniority - Learn more about the Seniority Filter.
Department - Learn more about the Department Filter.
Location - Learn more about the Location Filter.
Keywords - Learn more about the Keywords Filter.
Employee Size - Learn more about the Employee Size Filter.
Revenue - Learn more about the Revenue Filter.
Technologies - Learn more about the Technologies Filter.
Job Changes - Learn more about the Job Changes Filter.
Past Company - Learn more about the Past Company Filter.
Company Year Founded - Learn more about the Company Year Founded Filter.
Email - Learn more about the Email Filter
Phone Number - Learn more about the Phone Number Filter
LinkedIn URL - Learn more about the LinkedIn URL Filter
Customize Search Results Display
As default, 25 contacts are displayed per page, however you can customize your display amounts. Click the results drop down to display, and research, 25 or 50 contacts per page.
Customize the contact profile information and order of columns displayed. Click the drop down arrow on each column to enable text wrapping and hide the column. Additionally, you can resize the column width by clicking and dragging the right edge of the column. This allows you to make each column the width to best support your workflow.
Further customize the table layout, and select the columns of profile information you want displayed. Simply check column(s) for display, and reorder by holding the six dots on the right hand side and dragging to desired order as needed. When finished, just make sure to Save.

Research one data type at a time
In the results table, the Contact Emails and Company Emails columns have Find Emails buttons, and the Contact Phones and Company Phones columns have Find Phones buttons. Use them to research only the data you need. Use the column settings above to choose which columns appear.
Page size and cost: The number of contacts per page changes what Find All costs. For example, 50 contacts at 6 credits each is 300 credits. Choose 25 per page to spend less per click.
Tips and Advanced Strategies for Contact Searching
Additional Contact Search Features
Within Contacts Search you can also access Search History and Saved Searches.
Recent Searches
Review and launch previous contact searches applied filters within Search History. To launch a previous search, simply click the row to reapply the filters and then click Find.
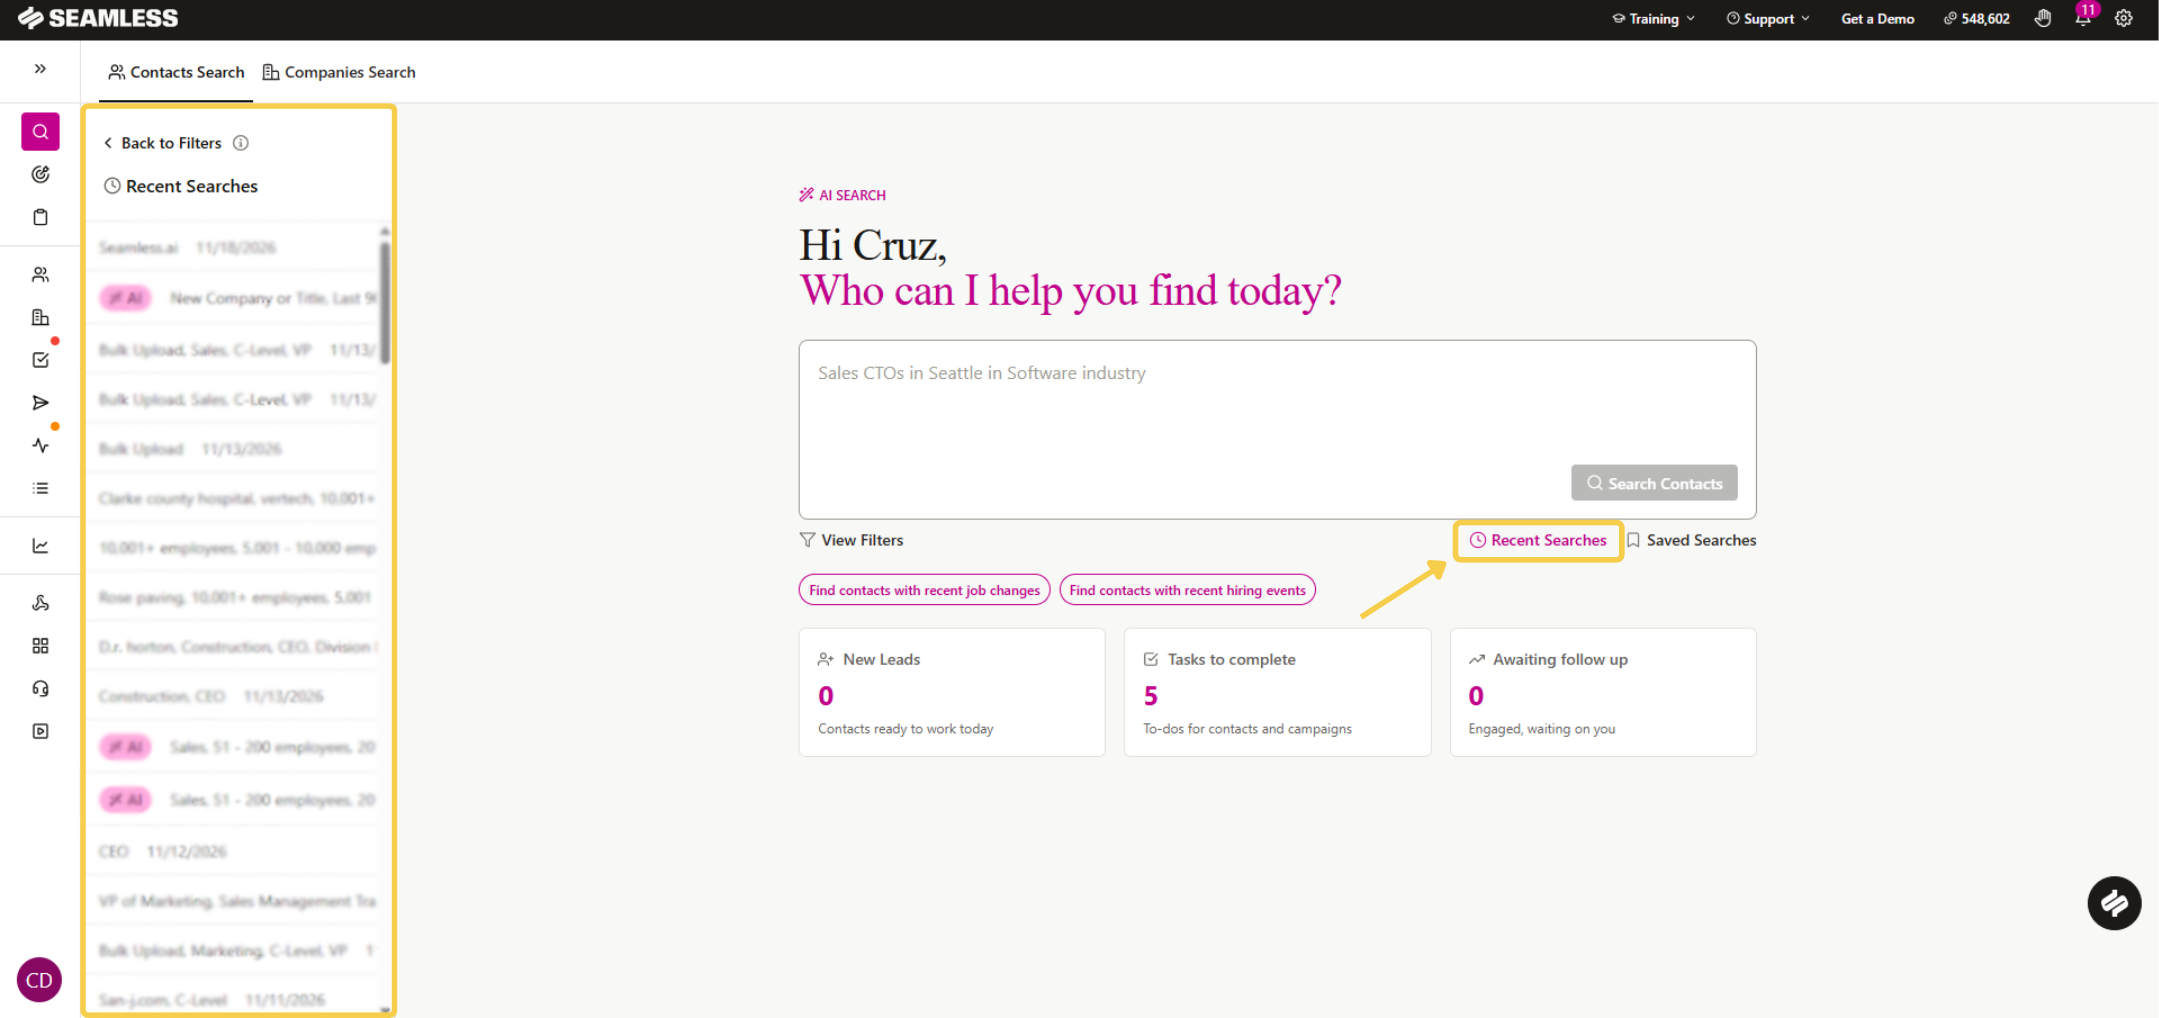
Saved Searches
Effortlessly store and manage past search criteria, allowing you to rerun and explore new contacts with ease.
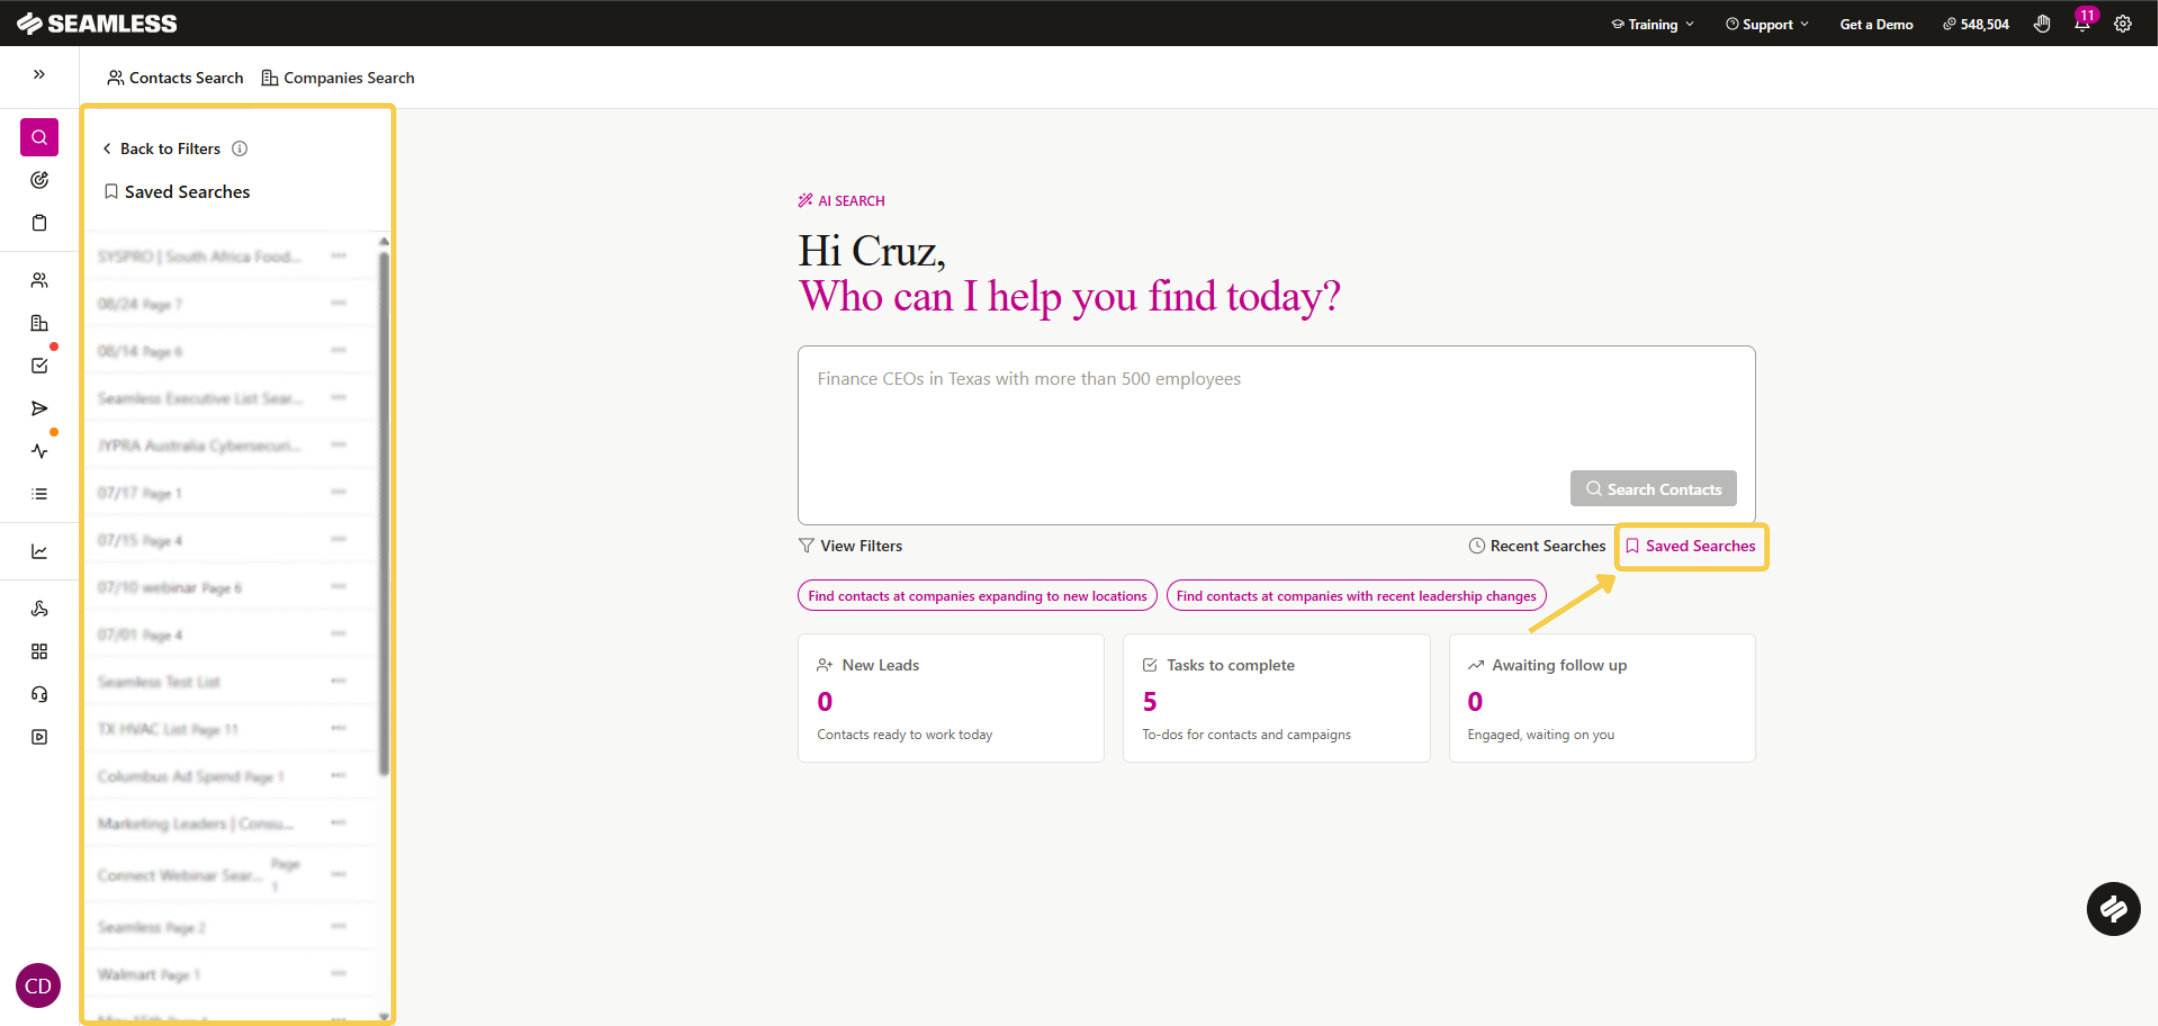
- After running a search, a Save Search bookmark icon will appear at the top of the Filters next to Load Saved Searches.
- Click Save Search, enter a name in the text field, and then click the Save Search button to store these criteria in the Load Saved Searches section of our app.
- Access the Saved Searches by selecting the Load button located at the top of the filter criteria. This feature enables you to load any previously saved criteria effortlessly!
- By selecting the name of your Saved Search, all the original filters will be reinstated from the initial save. You will be able to continue on the search on the same page you left off on the previous time! To remove them, simply click the "x" on the saved search entry under the filters.
Learn More about Saved Searches: How to Use Saved Searches Within Seamless
Optimizing Seamless Contact Search
Maximize your results with these essential tips:
- Experiment with Job Titles: Try both broad and specific variations to uncover more leads.
- Use Filters Wisely: Combine and refine filters like industry, revenue, and company size, while excluding irrelevant results, to target ideal prospects.
- Save and Reuse Searches: Store high-performing searches for quick access and consistency.
- Stay Organized: Keep saved contacts categorized for easy management.
- Adjust Total AI Threshold: Fine-tune this setting for the right balance between accuracy and volume. Learn more about applying a Total AI Threshold here.
- Integrate with Your Workflow: Sync Seamless with your CRM or sales tools for smoother operations.
- Match your data to your outreach. Use Emails only for email campaigns and Phones only for call-focused work. You can change your setting in Contact Management at any time, unless your admin has locked it.
- Check the cost before you click. Hover over Find All to see the total, and test on one page first.
- Look up specific people directly. Use the Email, Phone Number, or LinkedIn URL filters when you already have their details.
